
Creating a Worker Service in ASP .NET Core 3.0
ound development stack.
In ASP.NET, background workers were previously available as Hosted Services, even before the release of .NET Core 3.0. You could simply implement the IHostedService interface, register it in Startupby calling services.AddHostedService<MyHostedService>() and the ASP runtime would take care of the rest for you.
But even though they were supported, having one or multiple hosted services run as a part of your ASP.NET application isn’t exactly idiomatic design. That changed with the release of ASP.NET Core 3.0. There is now a Worker Service template available in Visual Studio, providing a template for independent background workers.
In this article, we’ll dive straight into creating a worker service that periodically sends an e-mail using SendGrid. You’ll learn to use the various ASP.NET companion libraries for Dependency Injection, Logging and Configuration in a worker service, and see how it is all tied together.

What You’ll Need
It is assumed you have some experience with ASP.NET Core, but not a whole lot. Topics such as Dependency Injection in .NET Core, Docker in .NET Core are outside the scope of this article, so it is suggested you familiarize yourself with them before continuing.
- Visual Studio 2019 Community*
- Docker Desktop (optional)
- .NET Core 3.0 SDK (comes with Visual Studio)
- A SendGrid account, or a similar e-mail provider
* You can use Visual Studio code or an editor of your choice as well. We’ll mainly need VS for the Worker Service template.
Getting Started
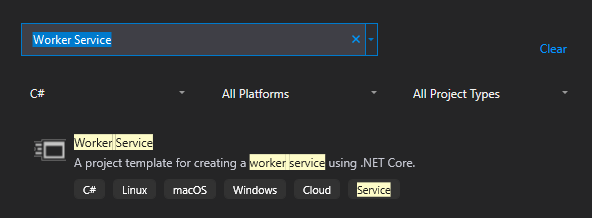
To get started, simply fire up Visual Studio, and create a new project of the Worker Service type:

Specify a name for your project, and optionally, tick the “Enable Docker Support” box in the last step if you want your worker service to be Docker enabled — we’ll get to that bit later on in this article.
After completing the wizard, you will have a basic worker comprised of a Program.cs and Worker.cs file, as well as an appsettings.json file containing the settings for your application.
We’ll start by doing some basic configuration.
Host Configuration
If we take a closer look at the Program.cs file, we’ll see that the CreateHostBuilder method contains our host context, as well as our service configuration for Dependency Injection:
If you’re used to regular ASP.NET Core applications, it is worth noting that a worker service comes with a slightly trimmed “Host” setup out of the box. For instance, user secrets require explicit configuration in order to work.
We will be adding SendGrid to our application later, and for that we’ll need an API key. Because it’s good practice to keep secrets like these — well — secret, we’ll get started by configuring user secrets for our worker service by adding the following line to our host configuration:
.ConfigureAppConfiguration(config => config.AddUserSecrets(Assembly.GetExecutingAssembly()))The resulting Host configuration should look like this:
This will make sure the user secrets from our assembly is used, so we can safely store our confidential configuration values later on. It’s worth noting that if you want support for Environment Variables or other configuration sources, you’ll need to add them here as well.
That’s all the host configuration we’ll do for now. We’ll get back to this file in the next step when we set up our e-mail messenger.
SendGrid Setup
Because our worker can’t send e-mails by itself, we’ll need a provider that allows us to do so. SendGrid is a popular option, and they offer a free account that allows you to send up to 100 e-mails per day. You can substitute SendGrid with any other e-mail provider of your liking, and the following steps will remain largely the same.
Install the latest SendGrid Client by running the following command in the NuGet Package Manager Console:
Install-Package SendGridAt the time of writing, the latest version of the library is 9.12.
Before we wire up SendGrid with the DI container, let’s set up our configuration. Right click your project, and click Manage User Secrets. It should open up a secrets.json file where we can keep our closest secrets.
Add the following to your secrets file, substituting <API_KEY> with your personal API key:
"SendGrid": { "ApiKey": "<API_KEY>" }With that out of the way, navigate back to Program.cs and modify the body of the CreateHostBuilder so that it looks like this:
That’s all there’s to it. We can now inject ISendGridClient into our actual worker code in the next step.
Implementing the Worker
The Dependency Injection framework used in ASP.NET Core (and also in our worker service) has the notion of Scoped Services. In regular ASP.NET Core applications, services are usually scoped to the request. That is to say, they are resolved or instantiated at the start of a request, and disposed of at the end of a request.
This model doesn’t necessarily apply to our worker service, because the definition of a scope isn’t as clear-cut. If we wish to consume scoped services in our worker, we’ll need to implement scoping ourselves. For the purpose of this article, we’ll assume that a “cycle” (i.e. every time the code runs between sleeps) is the equivalent of a request. Depending on the type of worker service you’re writing, this may vary, and should be carefully considered when designing the application, especially if you’re dealing with Entity Framework’s DbContext types.
In order to support scoping, we’ll need to take a slightly different approach than we’re used to in regular ASP.NET Core applications. Instead of injecting our services in our Worker’s constructor directly, we’ll inject an IServiceScopeFactory that can supply us with service scopes on a per cycle basis.
Let’s start off by injecting it in the constructor of our Worker type:
The Service Scope Factory
Now that we have injected the service scope factory into our worker, we can use it to determine our service scope, and we can ultimately resolve services from that scope:
Because we registered our ISendGridClient as a Scoped service, it will be disposed of at the end of the current block. This means that every time we iterate, the DI container will create a new instance for us.
ServiceScopes aren’t limited to Scoped services, you can resolve Transient or Singleton services from them as well. Of course, you can also opt to inject those in your constructor. To keep things uniform however, I personally tend to resolve all services I require in Worker Services from this scope.
Sending Email
We almost have everything we need to send our e-mail. Of course we don’t want to hard-code the recipient and the sender of the e-mail — we want to grab that from configuration.
Let’s start by opening appSettings.json and adding the following lines:
Of course, modify the from and recipient e-mails so they actually make sense.
Since the Worker Service doesn’t come with an IConfiguration instance by default, we’ll need to either inject it in the constructor, or resolve it from the ServiceScope we defined previously. For the purpose of this article, we’ll do the latter.
Grabbing the configuration is much like resolving any other service:
var configuration = scope.ServiceProvider.GetRequiredService<IConfiguration>();Armed with our configuration, we can now construct the message to send:
Feel free to modify the subject and content to something that feels a little bit more meaningful — maybe the current system resource usage?
Our ExecuteAsync method should now look something along the lines of:
I’ve added a log line so we can see whether everything is working or not directly in our application’s console window.
Running it should first resolve the SendGridClient and our configuration, after which it constructs an e-mail and uses the SendGrid API to send that message to the configured recipient.
After all that hard work, it is time for 30 minutes of well-deserved rest.
Docker
As mentioned previously in the article, it’s very feasible to run your worker services as Docker containers. If you have selected the “Docker” option when you created your project, you’ll find a Dockerfile in your project. If you didn’t, simply right click your project, select Add, then click Docker Support and Visual Studio will create one for you.
You can build a Docker image for your application by running the following command from the directory that contains your Dockerfile :
docker build -t my-worker .After which you should be able to docker run my-worker to run your application on Docker. Do keep in mind your need Docker Desktop for any of this to work.
If you’re looking for a place to run or experiment with containerized workloads either on a VM or in a Kubernetes cluster, I highly recommend DigitalOcean. They provide Docker VMs or even managed Kubernetes at very affordable prices.
The above link is my personal referral link, and it will get you $50 in free credit to experiment or run your workloads with.
Things to Keep in Mind
We’ve had the possibility of making worker services like these in previous versions of ASP.NET Core as well. You could even host a bunch of them in any ASP.NET Core application. Having a bunch of them in a single application gets really messy, really fast.
The whole point of having separate worker services is to keep them small. Before you create a service, make sure you know exactly what its responsibilities are, and try not to just “shrug everything under the rug”.
Running services like these is extremely cheap in terms of resources, and keeping them small in size and highly specialized keeps them easy to maintain or replace over an extended period of time.


Post a Comment